


MOZA MH16 Flightstick
Got Questions?
Email: support@simulatordirect.com
Phone: (714) 202-9416
Choose options
- Description
- Product Features
- What's Included
- Product Specifications
- Getting Started Guide
- Product Installation Guide
- FAQ's
- Shipping/Returns & Warranty Policy
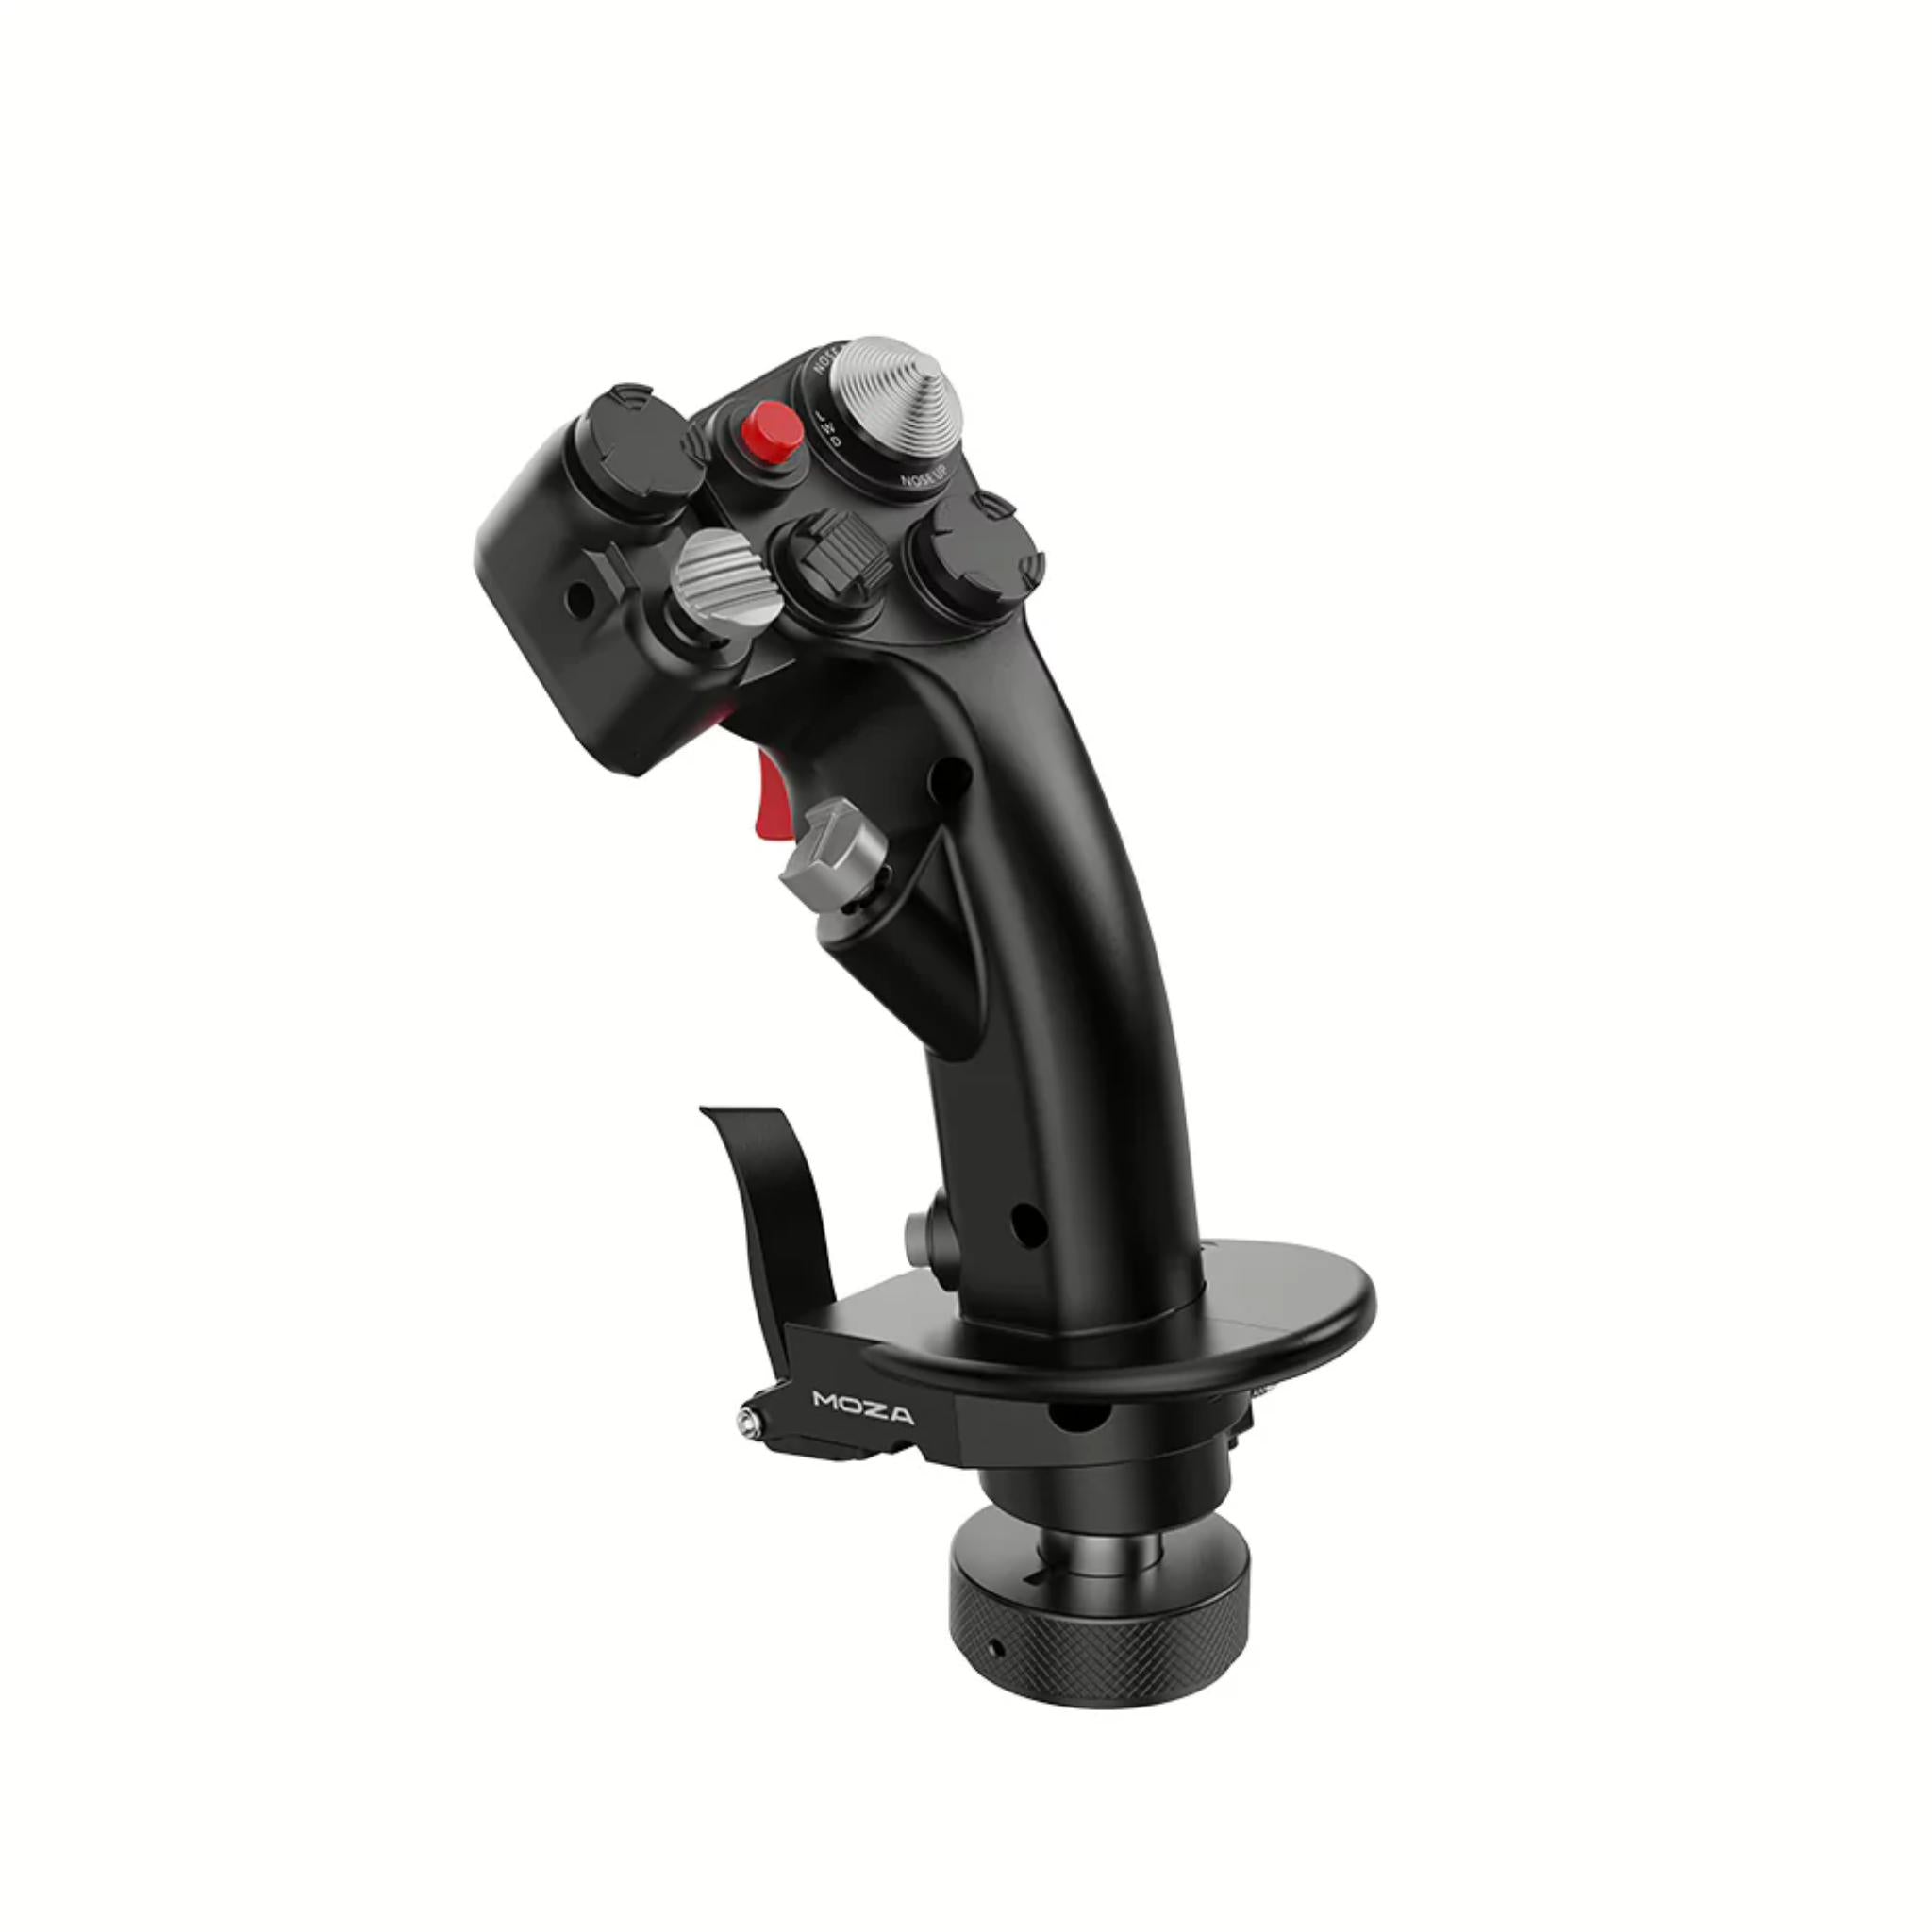
MOZA MH16 Flightstick
Experience unmatched realism and precision with the MOZA MH16 Flightstick, crafted from aviation-grade aluminum alloy with a durable automotive-grade paint finish.

Inspired by classic fighter aircraft controls, the MH16 offers a modular design with detachable side modules using pogo pin connections for quick installation and stable operation.

With 30 fully programmable input signals, including triggers, hats, switches, and buttons, this flightstick provides extensive customization through the MOZA Cockpit Control Software.

The integrated ALPS 8-way thumbstick allows precise trim, POV, and camera control. Plug-and-play compatibility with MOZA bases ensures a seamless, reliable flight simulation experience, combining authenticity, durability, and immersion for both enthusiasts and professional pilots.

Product Features
|
Feature |
Details |
|---|---|
|
Aviation-grade aluminum body |
Grip constructed from aluminum alloy with automotive-grade paint for rigidity, durability, and heat stability. |
|
Classic fighter design |
Shape and control layout inspired by iconic military aircraft sticks for immersive combat and high-performance flying. |
|
30 programmable inputs |
Up to 30 input signals (buttons, triggers, hats, toggles) for mapping complex aircraft functions in sims like DCS and MSFS. |
|
Modular expansion system |
Detachable side modules connect via pogo pins, adding extra switches with secure, cable-free installation. |
|
ALPS 8-way hat switch |
High-quality ALPS 8-way thumbstick for smooth and reliable POV, trim, or camera control. |
|
Open ecosystem compatibility |
Designed as an open ecosystem grip that can work with MOZA and many third-party bases (via appropriate mounts/adapters). |
|
Plug-and-play with most bases |
Effortlessly fits with compatible flight bases and supports plug-and-play operation for quick setup. |
|
MOZA Cockpit integration |
Configuration via MOZA Cockpit software: map buttons, create profiles, and adjust hat modes (D-pad vs hat). |
|
Adjustable palm rest |
Hand rest height can be adjusted with the included tools for better comfort and ergonomics. |
|
Two signal modes |
Stick can run in D-pad mode (30 signals) or hat-switch mode (26 signals) for more flexible bindings. |
What’s Included
-
MOZA MH16 Flightstick × 1
-
Toolkit × 1 (hex keys and spare screws / hardware)
-
User documentation / quick guide (printed or digital)
Product Specifications
Core Specs
|
Category |
Spec |
|---|---|
|
Product Name |
MOZA MH16 Flightstick |
|
Platform |
PC (Windows) |
|
Main Body Material |
Aluminum alloy / aerospace-grade aluminum |
|
Input Signals |
Up to 30 input signals |
|
Hat Switch |
ALPS 8-way thumbstick |
|
Ecosystem |
Open ecosystem; compatible with MOZA and many third-party bases (adapter may be required) |
Electrical & Interface
|
Category |
Spec |
|---|---|
|
Rated Voltage |
3.3 V |
|
Rated Current |
5 A |
|
Connector |
5-pin aviation connector |
|
Z-Axis Module |
Optional add-on module (not included by default) |
Physical
|
Category |
Spec |
|---|---|
|
Dimensions (L × H × W) |
99 × 213.5 × 132 mm |
|
Construction |
Metal grip with detachable modular side components and adjustable hand rest |
|
Package Weight |
Approx. 2.0 kg (box) |
Getting Started Guide
-
Unbox and inspect the stick
-
Remove the MH16 and toolkit from the packaging.
-
Check the grip, connector, and side modules for any visible damage.
-
-
Prepare your base (power OFF)
-
Make sure your flight base (e.g., MOZA AB9 or compatible third-party base) is mounted securely and powered down.
-
-
Connect the flightstick cable
-
Pull out the connection cable from the MH16 grip.
-
Align the arrow on the aviation connector with the mark on the base and insert fully.
-
-
Lock the grip in place
-
Tighten the nut ring at the bottom of the grip clockwise until snug.
-
Use the supplied wrench to fully secure the connection so the stick cannot twist or wobble.
-
-
Adjust the hand rest
-
Remove the small protective cover over the hand rest screws.
-
Loosen the lower screw, slide the palm rest to your preferred height, then tighten and replace the cover.
-
-
Optional: Install side modules
-
If using a side expansion module, align its pogo pins with the slots on the grip and secure using the included screws and wrench.
-
After powering on, confirm the indicator light on the module is lit (shows proper power/connection).
-
-
Power on your base and PC
-
Turn on the base, then your PC, with all cables connected.
-
-
Install MOZA Cockpit software
-
Download and install MOZA Cockpit from MOZA’s site.
-
Confirm the base and MH16 are detected.
-
-
Configure buttons and hat modes
-
In MOZA Cockpit, switch between D-pad mode (30 signals) and hat mode (26 signals) and set up your preferred mappings.
-
-
Bind controls in your simulator
-
Open your primary sim (MSFS, DCS, X-Plane, etc.), assign axes/buttons, and test in a simple mission or free flight.
-
Product Installation Guide
-
Check safety guidelines
-
Keep the device away from liquids, excessive heat, and direct sunlight.
-
Do not disassemble the grip; use only the provided tools and follow the manual for adjustments.
-
-
Prepare your cockpit or desk
-
Ensure your base is firmly attached to a rig or desk clamp (no flex or wobble).
-
Sit in your usual position and make sure the base height and angle are comfortable before adding the grip.
-
-
Connect the aviation cable
-
Pull the connector cable from the MH16.
-
Align the arrow on the connector with the line or mark on the base, then push the connector in until fully seated.
-
-
Secure the mounting nut
-
Turn the nut ring on the grip clockwise by hand to snug it up.
-
Use the included wrench to add an extra turn or two until the connection feels completely rigid.
-
-
Install or remove side modules
-
To remove a module: use Wrench 1 to remove the M3 screw, and Wrench 2 to remove the smaller M2 screw, then slide the module off.
-
To install a module: align the pogo pins with the grip’s contacts, slide the module into position, and tighten both screws. After powering up, check the module status LED in the lower-left corner.
-
-
Adjust the palm rest
-
Remove the protective cap over the hand-rest screws.
-
Turn the lower screw counter-clockwise to raise the rest or clockwise to lower it.
-
Tighten the upper nut to lock the position and reinstall the protective cover.
-
-
Connect other flight peripherals
-
Connect throttle, rudder pedals, and other devices either directly to the PC or through appropriate ports on your base, depending on your ecosystem.
-
-
Cable routing and strain relief
-
Route the MH16 cable away from moving pedals, seat rails, and sharp edges.
-
Use cable ties or clips to secure the run and prevent strain on the connector.
-
-
Software setup in MOZA Cockpit
-
Open MOZA Cockpit and locate the MH16 in the device list.
-
Test each button and hat direction to confirm they register.
-
Choose D-pad mode or hat-switch mode, then save a profile for your favorite aircraft/sim.
-
-
Game-side configuration
-
In your simulator, clear any default joystick bindings that conflict, then re-bind controls in a logical layout (e.g., trim, views, weapon controls, countermeasures).
-
Run a short flight or mission to confirm everything works under real conditions.
-
-
Final safety check
-
After your first session, re-check all nuts, screws, and module connections.
-
If you notice any abnormal behavior, stop using the device and refer to MOZA support per the manual’s precautions.
-
Product Manual and User Guides
Frequently Asked Questions
Q: What material is the MH16 Flightstick made from?
A: The MH16 grip is built from aviation-grade aluminum alloy with an automotive-grade finish, giving it a solid, metal feel and long-term durability similar to real aircraft controls.
Q: How many buttons and inputs does the MH16 have?
A: The stick supports up to 30 programmable input signals, including multiple hats, buttons, and switches. Using MOZA Cockpit software, you can map every input to specific actions and create aircraft-specific profiles.
Q: Is the MH16 compatible with non-MOZA flight bases?
A: Yes. The MH16 is designed as an open-ecosystem grip and is structurally compatible with many mainstream flight sim bases. Some third-party bases may require an adapter or specific configuration, so it’s best to confirm compatibility with the base manufacturer or MOZA before purchase.
Q: Do I need MOZA Cockpit software to use the stick?
A: The grip can work once connected to a compatible base, but MOZA Cockpit is strongly recommended. It lets you test inputs, switch between D-pad and hat modes, assign functions, and save different profiles for multiple aircraft and simulators.
Q: Can I add or remove the side expansion modules?
A: Yes. The MH16 uses detachable modular components with pogo-pin connections. You can remove or install side modules using the included wrenches, giving you more switches when needed without extra cabling.
Q: Is the ALPS hat switch good enough for view control and menus?
A: The hat uses an ALPS 8-way thumbstick, known for smooth and reliable operation. It’s well suited for camera control, trim inputs, menu navigation, or D-pad functions in your sim.
Q: Does the MH16 come with a Z-axis (twist) function by default?
A: No. The Z-axis module is optional—the standard MH16 flightstick does not include twist-rudder out of the box. If you want that function, you’ll need the compatible Z-axis module or a separate set of rudder pedals.
Shipping Policy
Simulator Direct fulfills MOZA Racing products through authorized ASI distribution warehouses located throughout the United States. Orders ship directly from ASI’s facilities using trusted freight and parcel carriers to help ensure secure delivery and product protection.
Because MOZA Racing products are typically large, heavy, or freight-class items, shipping methods and timelines may differ from standard parcel shipments.
Shipping Methods & Charges
- ASI Partner products generally ship via freight carriers.
- Select smaller items may ship via standard parcel services when applicable.
- Shipping method and cost may vary based on product size, product weight, destination, and available carrier options.
- Any applicable shipping charges will be displayed at checkout or confirmed before order fulfillment when required.
Processing Time & Order Handling
- Most ASI Partner orders ship same business day or next business day, depending on inventory location and order cutoff time.
- General warehouse cutoff times:
- East Coast warehouses: Orders placed before 2:00 PM PST may ship same day.
- Los Angeles warehouse: Orders placed before 12:00 PM PST may ship same day.
- Other U.S. warehouses: Orders placed before 4:00 PM PST may ship same day.
- Orders not shipped the same day will typically ship the next business day.
- ASI Partner warehouses operate Monday–Friday and are closed on weekends and major holidays.
Inventory Availability & Backorders
Inventory availability is maintained through ASI Partner’s distribution network and may vary by warehouse.
- Inventory data is accessible through ASI systems, but it is not live and typically updates once per day.
- An item may appear available but sell out before an order is processed.
- Simulator Direct may confirm availability manually before finalizing an order when necessary.
If an item becomes unavailable after order placement:
- Simulator Direct will notify the customer.
- Options may include holding the order, partial shipment if supported, or cancellation with refund.
- Estimated restock timelines will be communicated when available.
Tracking & Delivery
- Tracking information will be provided by email once your order ships.
- Freight deliveries are typically curbside delivery unless otherwise arranged.
- If special delivery services are required, please contact support@simulatordirect.com before placing the order.
- Examples may include lift gate service, inside delivery, or scheduled delivery appointment.
- Availability and added costs must be confirmed before fulfillment.
Return Policy
Returns for ASI Partner-fulfilled products follow ASI Partner’s official return policy.
Because ASI Partner operates as a distribution provider rather than a retail storefront, return eligibility, restocking fees, and return shipping costs may vary by product and circumstance.
Return Authorization & Conditions
- All returns require prior written authorization from Simulator Direct.
- Unauthorized returns may be refused or returned to the sender.
- Items must be returned in original packaging, unused, and in resalable condition unless otherwise approved.
- Certain items may be non-returnable due to size, customization, or manufacturer restrictions.
- Special return approvals may be granted on a case-by-case basis and are subject to ASI Partner’s acceptance.
Return Shipping & Fees
- Customers are responsible for all return shipping costs unless the return is due to an error or defect.
- Original shipping charges are non-refundable.
- Restocking fees may apply per ASI Partner’s return policy.
- Carrier fees associated with refused deliveries, storage, or re-routing may be deducted from the refund.
- Refunds are issued only after ASI Partner receives, inspects, and approves the returned item.
Damaged or Incorrect Items
If your order arrives damaged or incorrect:
- Contact support@simulatordirect.com promptly.
- Provide your order number, photos of the damage or issue, and a description.
- Simulator Direct will coordinate directly with ASI Partner to resolve the issue in accordance with their policies.
Order Changes & Cancellations
Orders are processed quickly once submitted.
- Orders not yet shipped may be eligible for cancellation or modification.
- Orders that have shipped or entered fulfillment may be subject to return policies and applicable fees.
- Late-stage cancellations may incur shipping or handling charges.
- Please contact support immediately if changes are needed.
Questions or Assistance
For any ASI Partner-related shipping, returns, or order questions, contact:
support@simulatordirect.com
We will coordinate directly with ASI Partner on your behalf to help ensure a smooth experience.

Newsletter
Exclusive Updates. Delivered Before Anyone Else.